

The world of 3D printing has become increasingly accessible, and the Prusa Mini is one of the most popular compact 3D printers for both beginners and experienced users. Whether you’re creating prototypes, custom tools, or fun designs, understanding how to download and print 3D models efficiently is crucial for achieving the best results. This guide will walk you through the essential steps, from finding reliable models online to optimizing your prints for the Prusa Mini.
The Prusa Mini stands out for its affordability, reliability, and high-quality output. Unlike larger printers, it offers a simplified setup process without compromising on precision. However, to fully harness its potential, users must learn not only how to operate the machine but also how to handle 3D model files effectively. This knowledge ensures that every print is smooth, detailed, and free from errors, making the Prusa Mini a valuable tool in any maker’s workshop.
Finding the Right 3D Models for Prusa Mini
The first step in 3D printing is acquiring the right model. Various online repositories offer free and paid 3D models compatible with the Prusa Mini. Websites like Thingiverse, MyMiniFactory, and PrusaPrinters provide a wide range of designs, from intricate figurines to functional household items. When choosing a model, pay attention to file formats. STL and OBJ files are the most commonly supported by the Prusa Mini and are ideal for slicing software.
Before downloading, it’s important to consider the model’s complexity. Highly detailed models may require longer print times and precise calibration on your Prusa Mini. Additionally, check the licensing terms. Some models are free for personal use, while others require commercial licenses. Selecting the right model saves time and ensures that your Prusa Mini produces prints with minimal errors, giving you a satisfying printing experience.
Preparing 3D Models for Printing
Once you have downloaded your desired 3D model, the next step is preparation. This process involves importing the file into slicing software, which converts it into G-code that the Prusa Mini can understand. PrusaSlicer, the official software for the Prusa Mini, offers an intuitive interface with customizable settings. You can adjust parameters such as layer height, infill density, and print speed to optimize your output.
It’s also crucial to orient the model correctly on the build plate. Proper orientation reduces the need for supports and enhances print quality. Checking for errors in the model is equally important. Many slicers have built-in tools to repair common issues like non-manifold edges or flipped normals. Proper preparation ensures that your Prusa Mini prints efficiently, with fewer failed attempts and higher-quality results.
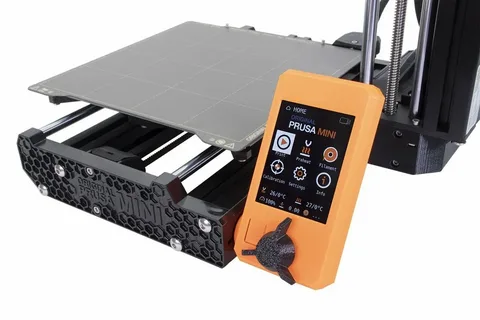
Setting Up Your Prusa Mini for Printing
Before starting the print, you need to set up your Prusa Mini correctly. Begin with a clean and leveled build plate. The printer comes with an automatic mesh bed leveling system, but manual calibration may still be needed for optimal adhesion. Next, ensure your filament is loaded correctly. The Prusa Mini supports a variety of filaments, including PLA, PETG, and ASA, each with specific temperature requirements.
Maintaining the right environmental conditions is also important. A stable room temperature and minimal airflow around the Prusa Mini prevent warping and improve layer adhesion. Additionally, make sure the printer firmware is up-to-date, as updates can enhance performance and add new features. Proper setup not only extends the life of your Prusa Mini but also ensures each print is accurate and visually appealing.
Printing and Monitoring Your 3D Model
With your model prepared and printer set up, it’s time to start printing. Transfer the sliced G-code to the Prusa Mini via SD card or USB connection. Begin the print and closely monitor the first few layers, as they are critical for adhesion and overall success. The Prusa Mini’s compact design allows you to easily observe the process, making it simpler to spot potential issues early.
Monitoring is not only about watching the print physically. Many users utilize Prusa’s remote monitoring options to track progress and receive notifications. Pay attention to filament feed, layer consistency, and nozzle behavior. Any irregularities at this stage can be corrected before they ruin hours of printing. With careful monitoring, your Prusa Mini can produce consistently high-quality 3D prints that match your expectations.
Post-Processing and Finishing Your Prints
After printing, post-processing is often necessary to achieve a polished final product. Remove supports carefully and sand rough edges to enhance the appearance of your 3D model. Depending on the material, you may also apply chemical smoothing or painting techniques to improve aesthetics. The Prusa Mini produces clean layers, which makes post-processing faster and easier.
Proper storage and maintenance of your prints are equally important. PLA and other filaments can be sensitive to humidity, so keeping finished models in a dry environment preserves their quality. Cleaning and maintaining your Prusa Mini after every print, including nozzle inspection and build plate cleaning, ensures consistent performance for future projects. By combining careful printing with post-processing, you can maximize the capabilities of your Prusa Mini and create professional-looking 3D prints every time.
Conclusion
Downloading and printing 3D models on the Prusa Mini is a rewarding process that combines creativity with technical skill. From selecting the right models to proper preparation, setup, and post-processing, every step plays a crucial role in achieving high-quality prints. The Prusa Mini’s user-friendly design and robust capabilities make it an ideal choice for both beginners and experienced makers looking to explore the world of 3D printing.