

Turning your favorite artwork or logo into an embroidery-ready file might sound tricky, but it’s much easier with the right guidance. If you’ve ever wanted to Digitize Image to PES File for your Brother or Babylock embroidery machine, you’re in the right place. The PES format is widely used in these machines, and converting your design correctly ensures crisp, clean stitching every time.
In this guide, we’ll walk through what PES files are, why digitizing matters, how the process works, and the best tips to get professional-quality results from your digitized designs.
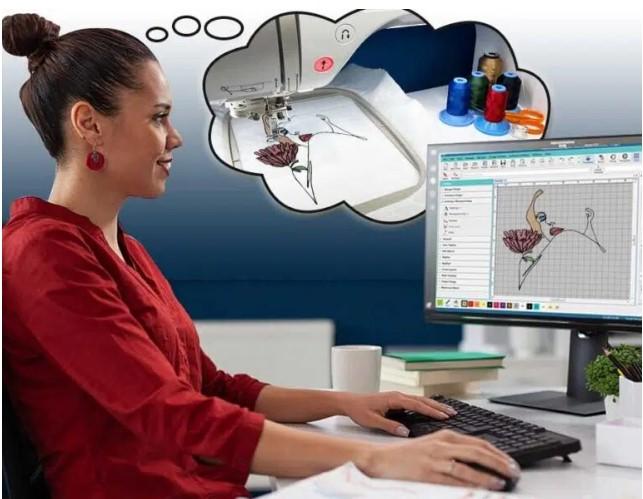
What Is a PES File and Why It Matters
A PES file is a stitch file format primarily used by Brother and Babylock embroidery machines. It contains all the instructions your machine needs to recreate a design—such as stitch types, density, thread colors, and sequence.
Without converting your image into this specific format, your embroidery machine can’t read or stitch the design. That’s why digitizing is such an essential first step in any embroidery project.
Why You Need to Digitize Images for Embroidery
When you digitize an image, you’re not just saving it as a different file type—you’re creating a precise blueprint for stitching. Standard image files like JPG or PNG are made of pixels, but embroidery machines can only read stitch data.
Here’s why digitizing is so important:
- Ensures accurate placement and proportions of your design
- Prevents thread breaks, puckering, or misalignment
- Optimizes stitch types and density for your chosen fabric
- Allows seamless scaling while maintaining stitch quality
- Produces consistent results on multiple garments
Skipping the digitizing step leads to messy, unusable stitch-outs.
The Step-by-Step Process to Digitize Image to PES File
Creating a PES file requires specialized embroidery software and a bit of technical knowledge. Here’s a simple overview of the process:
1. Prepare Your Artwork
Clean up your design by removing unnecessary details and ensuring it’s high resolution. Vector files (like SVG or AI) work best because they scale cleanly.
2. Import Image into Digitizing Software
Use software like Hatch Embroidery, Wilcom, or Embird to open your artwork and start assigning stitches.
3. Assign Stitch Types
Decide where to use satin, fill, or running stitches. Each part of the design needs a specific stitch type to achieve the right look and texture.
4. Set Stitch Directions and Densities
Adjust the stitch angles to avoid overlapping or gaps and tweak densities to suit your fabric type (lighter for delicate fabrics, heavier for sturdy ones).
5. Add Underlay Stitches
Underlays stabilize the fabric and give top stitches something to grab onto, helping prevent puckering or distortion during stitching.
6. Sequence the Design
Arrange the stitch order to minimize jump stitches and thread changes. This speeds up production and keeps the design clean.
7. Export as a PES File
Once everything is perfectly set, export the file as .PES and it’s ready to load onto your machine.
Common Mistakes to Avoid When Digitizing
Even a small error during digitizing can ruin a design. Watch out for these common issues:
- Too many tiny details: They won’t stitch well and can cause thread breaks.
- Incorrect stitch density: Too dense leads to stiffness and breakage; too loose causes gaps.
- Wrong fabric settings: Not adjusting for fabric stretch or thickness results in distortion.
- Ignoring test runs: Always test stitch your file before mass production.
Fixing these issues beforehand saves a lot of wasted time and materials.
Tips to Get the Best Stitch Results
A few simple tips can help you achieve clean, professional embroidery from your PES files:
- Start with clean, high-resolution artwork for better accuracy.
- Match thread colors carefully to your design for a polished look.
- Always test stitch on similar fabric before full production.
- Use proper stabilizers to keep fabric from shifting or stretching.
- Keep designs simple and bold if they’ll be stitched at small sizes.
These practices will make your digitized designs look stunning every time.
Software Options to Digitize Image to PES File
Here are a few popular software choices for creating PES files:
- Hatch Embroidery – User-friendly and powerful, great for beginners and pros.
- Wilcom – Industry-standard software with advanced features.
- Embird – Affordable and reliable, ideal for small businesses.
- SewArt – Budget-friendly, good for simple designs
Each has its learning curve, but they all let you save your final work as a PES file ready for Brother or Babylock machines.
Why Professional Digitizing Services Are Worth It
While it’s possible to learn digitizing yourself, it can be time-consuming and requires specialized skills. Professional digitizers can:
- Convert your artwork faster and more accurately
- Handle complex designs with clean, flawless stitching
- Provide edits or revisions if the first stitch-out needs tweaks
- Save you the cost of software and training
For businesses or anyone working with detailed logos, outsourcing is often the smartest option.
Final Thoughts
Learning how to digitize image to PES file can open up endless creative opportunities, whether you’re customizing gifts, building a clothing line, or personalizing uniforms. Proper digitizing ensures your design stitches smoothly and looks exactly as intended on your Brother or Babylock embroidery machine.
If you want perfect results without the hassle, Digitizing Buddy offers expert embroidery digitizing services with quick turnaround and flawless stitch quality—making it easy to transform your images into professional PES files ready to embroider.